The Internet of Things (IoT) is a fascinating and exciting area of technology, but it’s predominantly been reserved for the corporate context, keeping the details out of reach from most people who are curious to dabble with the technology.
So we set out to see if we could put together an inexpensive IoT project using an Raspberry Pi and some basic sensors.
This post will dive in and show you step-by-step how to builder your own fully-functional IoT device with centralized monitoring for about $100.
If you want to read more on IoT, be sure to check out our library of Internet of Things articles, including our very popular post on Aviation IoT and the F-35.
Contents
And special thanks to Ashwin Krishna and Jake Herman for doing this project and providing the content for the article here.
The inexpensive IoT Raspberry Pi project
Our goal with this project was to bring multiple hardware sensor devices and real-time data together to build a monitoring application using Thingworx platform.
If you’re not a Thingworx Partner, you can still get free 30-day access to a sandbox instance of Thingworx after registering on their Developer Portal.
IoT has broad definition, spanning across numerous domains and devices. This leads to numerous possibilities that can be enabled by IOT. Today, however without standards across the spectrum, we tend to run into interoperability issues while building IoT systems. We need some way for devices and apps to communicate and share data among each other.
So the question comes down to, “What does it take to achieve IOT today?”
Thingworx is the unifying platform of IoT
The answer to this lies in the solutions to the challenges described below-
- Device Discovery – The ability to tell when a new device has joined the network.
- Device Capabilities – How the device introduces itself and its capabilities to other devices in the network or to the monitoring/software application.
- Device Interface – The specification describing how the device will share and consume data.
- Communication – How the data travels across the network.
- QoS (Quality of Service) – How reliably the network carries data, and adjusting accordingly.
- Application Software – Monitoring and acting on the data.
The Thingworx platform addresses some of the challenges today, enabling us to achieve IoT.
Thingworx programming concepts
Using the concept of Thing Templates, Thing Shapes, and Things, Thingworx addresses challenges of specifying device capabilities and device interface.
These concepts are built using object-oriented programming. “Thing Shapes” is like an “abstract” class describing the various parameters and methods and services that are required for a Thing.
Typically, the Thing Shapes are implemented by Thing Templates. This is similar to classes extending from abstract classes. And Things are actual instances of Thing Templates, similar to instances of a class.
Thingworx doesn’t enable dynamic discovery of devices; the devices are fed with the information about where to communicate to during device startup. The Communcation and QoS aspects are unclear on the Thingworx platform at this point. The monitoring software is built using mashups, and this is where Thingworx has focused most of its efforts. Mashups make it a lot easier to build and deploy an application that can handle complex data and rules in the matter of minutes.
Alright, now that we have the platform described, let’s move to the hardware we used for this project.
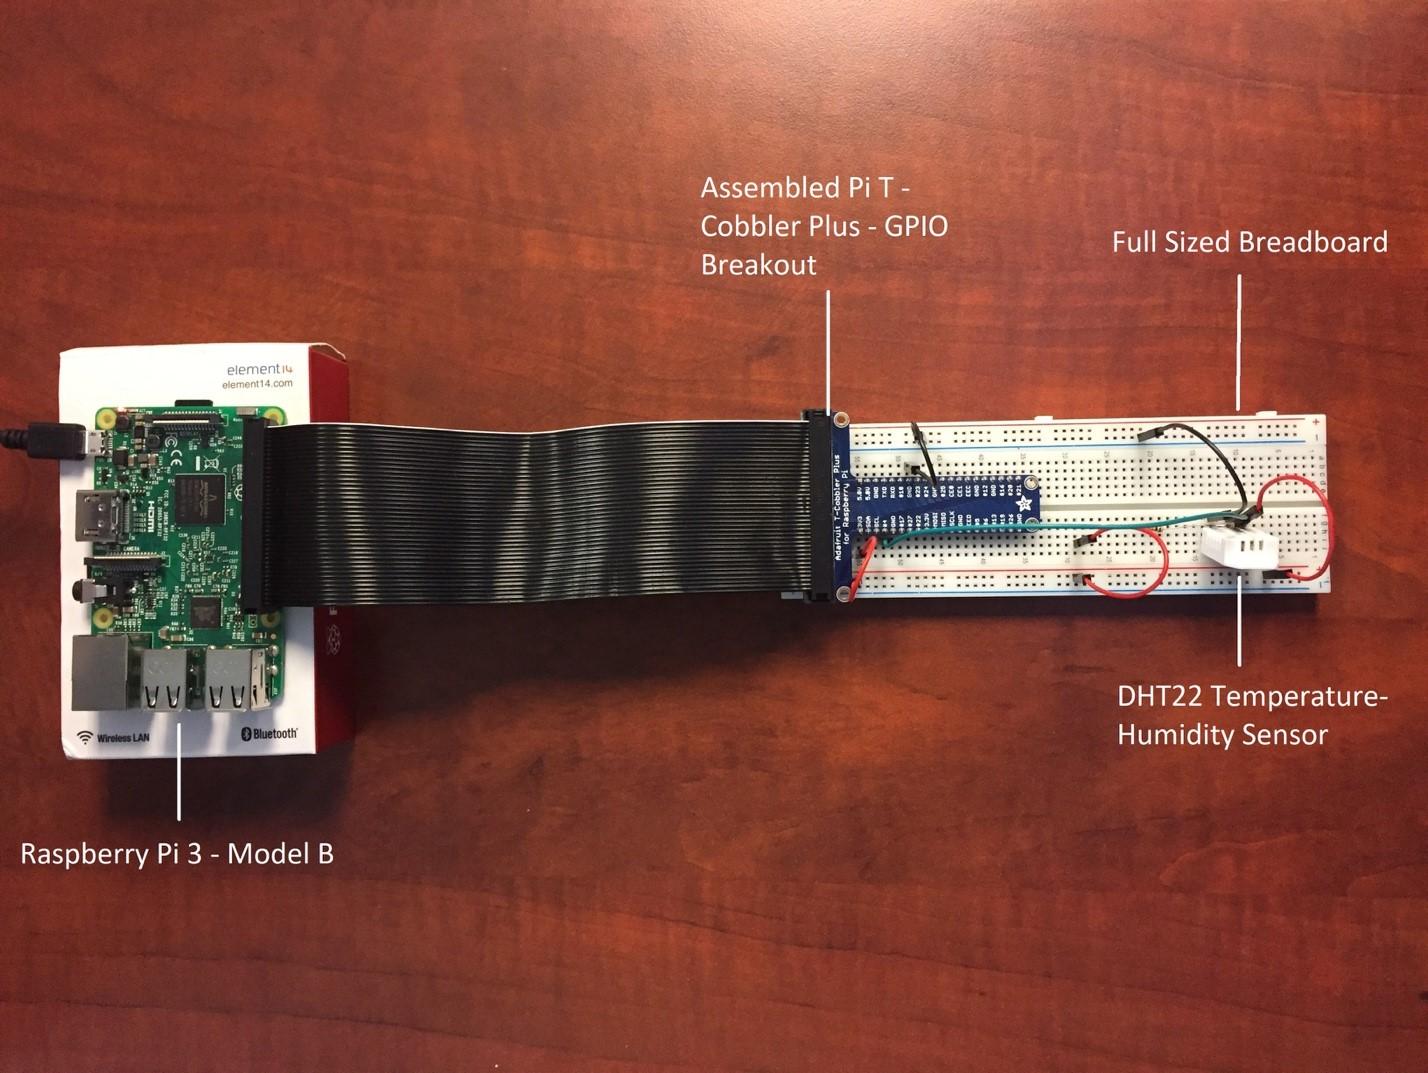
Raspberry Pi IoT Project Hardware Components
Here’s the basic list of components used in this project:
- DHT22 Temperature and Humidity Sensor
- Raspberry Pi 3 – A Wi-Fi capable single board computer.
- T-Cobbler GPIO Breakout – To map the pins from the Raspberry pi to breadboard.
All components were purchased inexpensively from Adafruit.com. And how it looks assembled…
Connecting the Raspberry Pi IoT Device Hardware
Step 1: Wiring the sensor
The wiring diagram for the DHT22 sensor is shown here. Making the connections is pretty simple. We followed the steps illustrated in this post. https://learn.adafruit.com/dht-humidity-sensing-on-raspberry-pi-with-gdocs-logging/wiring
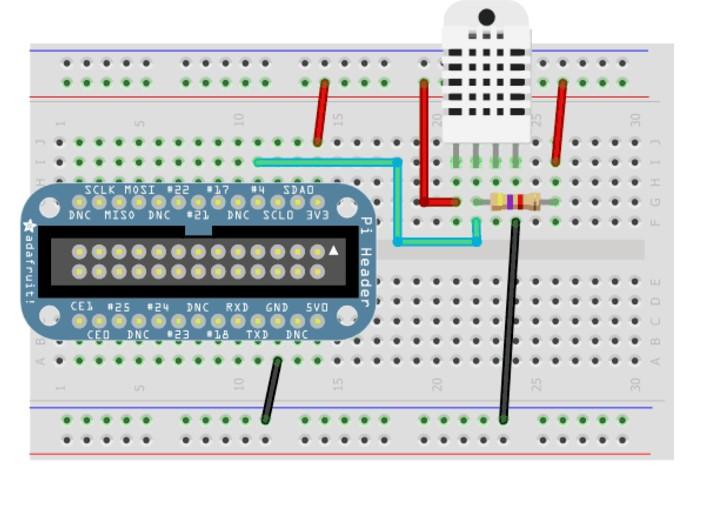
Figure 1:Wiring diagram for the DHT22 sensor
Step 2: Reading data from sensor
We used a Python library to read the DHT series of humidity and temperature sensors on a Raspberry Pi. Instruction on how to install and run the program can be found here. https://github.com/adafruit/Adafruit_Python_DHT
Step 3: Connecting to the Thingworx platform
We use the Thingworx Edge Java SDK provided by Thingworx for managing connection and communication between the Raspberry Pi and the Platform.
Here’s the configuration info that needs to be updated in the SDK:
- The details about location of the Python library that is responsible for reading the temperature and humidity values from the sensors.
- The IP address of the Thingworx platform.
Once these configurations are added, the SDK is built using Maven to create a runnable JAR. When the runnable JAR is executed, it connects to the Thingworx Platform and starts shipping the temperature and humidity data.
Step 4: Modeling the device
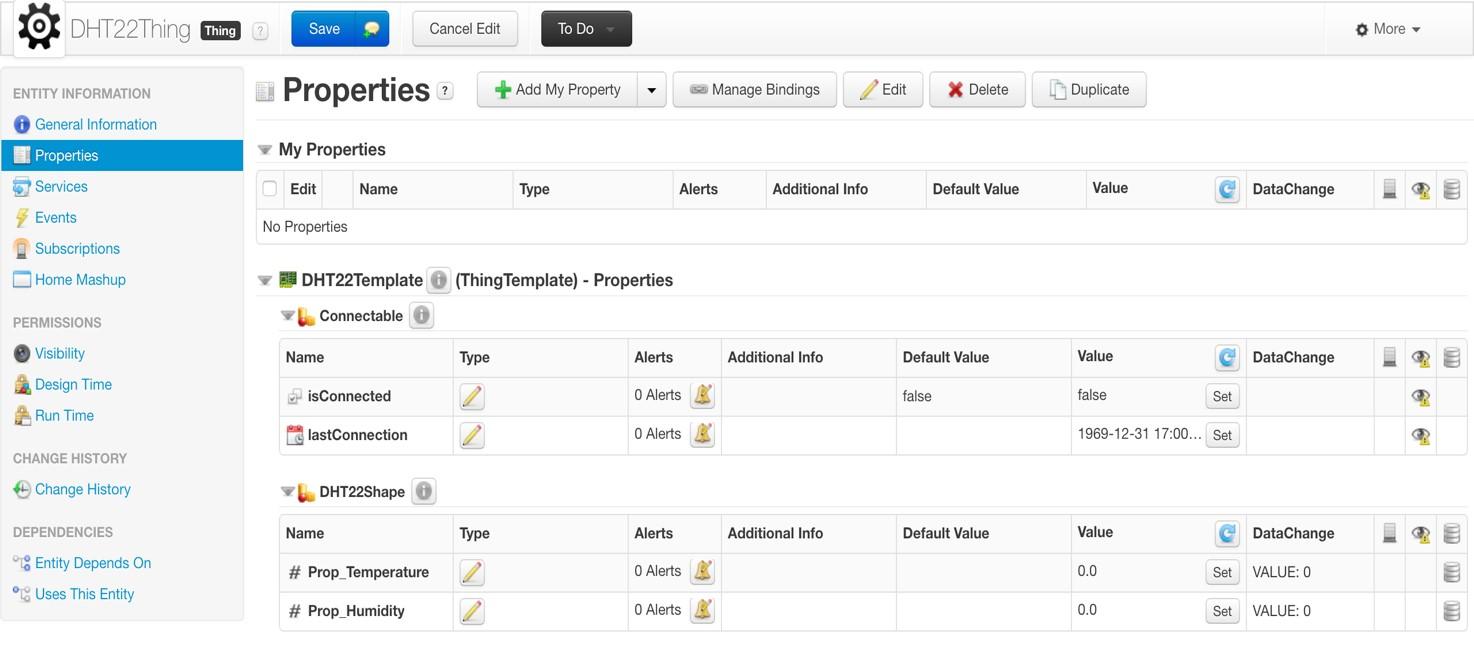
The device (in our case the DHT22 Sensor) needs to be modeled on the Thingworx platform so that it can capture and make meaningful sense of the data. We did this using Thing Template, Thing Shape, and Thing.
Below is a screen shot of the modeled DHT22 sensor. The properties “Prop_Temperature” and “Prop_Humidity” are used to capture the temperature and humidity values coming in from the Raspberry Pi.
Step 5: Creating a monitoring application
Monitoring Application (aka Mashup) is created to display the data being received from the DHT22 sensor. Below is a screen shot of a Mashup editor.
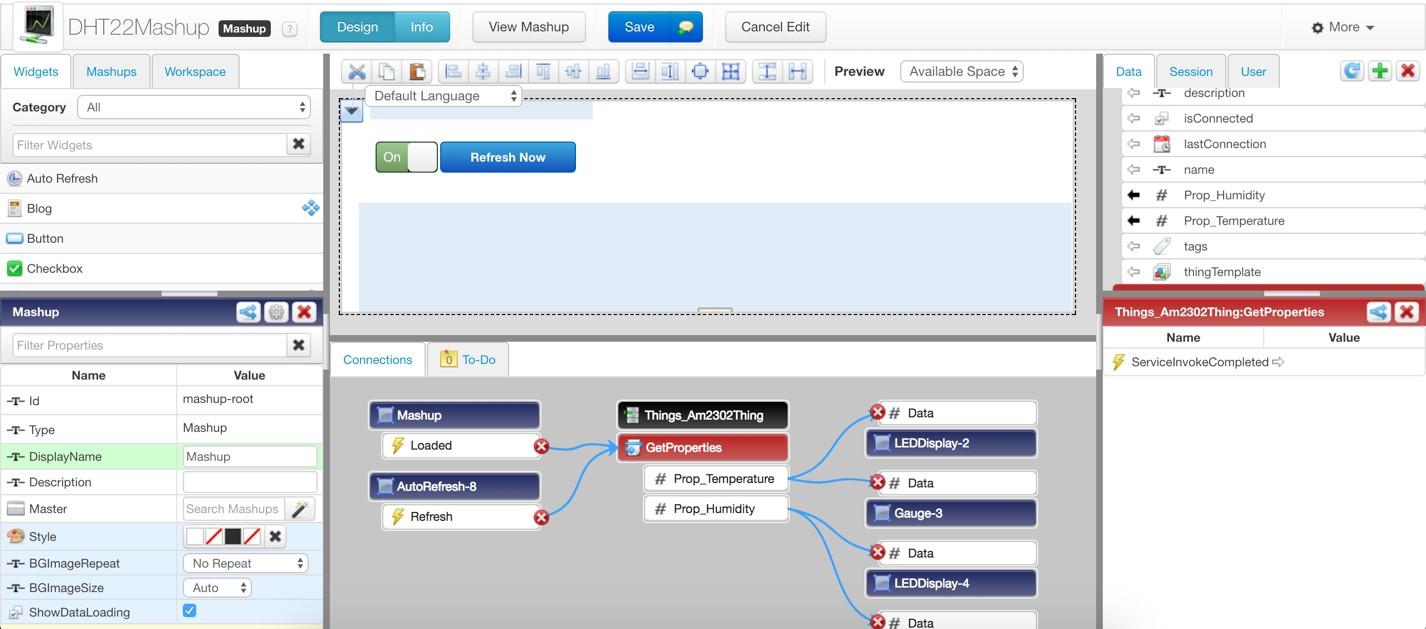
We built a Mashup with a gauge and LED to display the current temperature and current humidity. We added a Timeseries Graph to store the past values that can show how the values for these properties have changed over time. We also added a auto refresh ON|OFF toggle and also a on demand refresh button that when triggered gets the latest values.
Below is the screen shot of the final mashup.
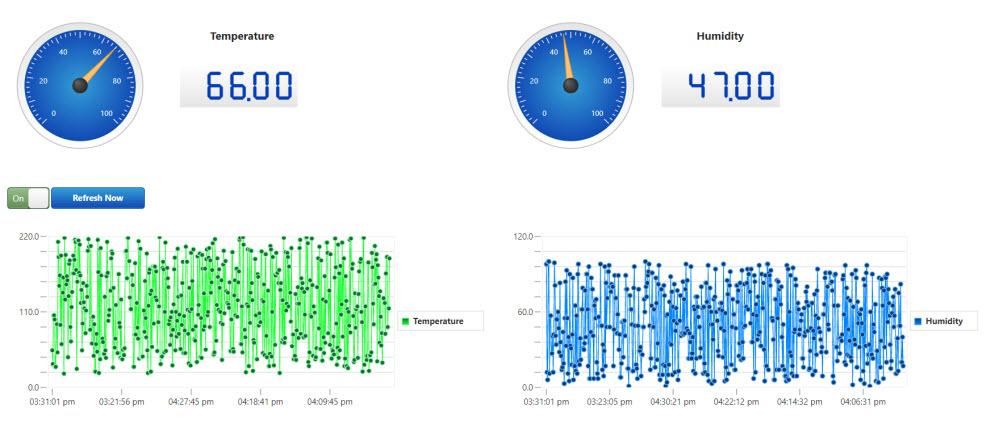
What do you think, do we have a wonky sensor?
Conclusion
That’s it! For about $100, you can create your own IoT device on the Thingworx platform. Let us know if you have any questions on setting yours up.